D:\cypress-example>npm run serve

> cypress-example@1.0.0 serve
> serve public -p 8000

UPDATE AVAILABLE The latest version of `serve` is 13.0.2

   ┌──────────────────────────────────────────────────┐
   │                                                  │
   │   Serving!                                       │
   │                                                  │
   │   - Local:            http://localhost:8000      │
   │   - On Your Network:  http://10.214.134.2:8000   │
   │                                                  │
   │   Copied local address to clipboard!             │
   │                                                  │
   └──────────────────────────────────────────────────┘
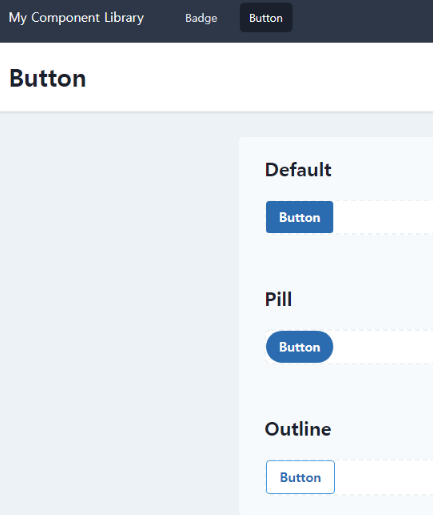
http://localhost:8000 접속하여 테스트 페이지 확인
테스트 페이지 확인
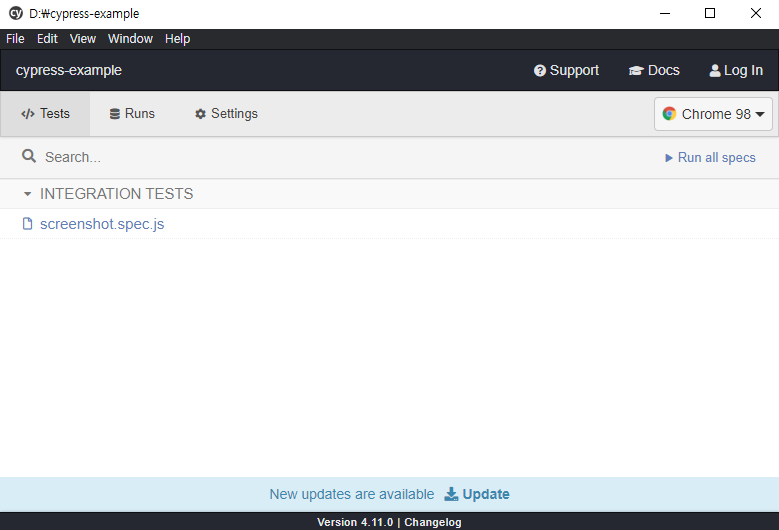
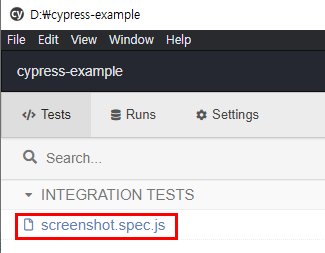
테스트 스크립트 파일 확인
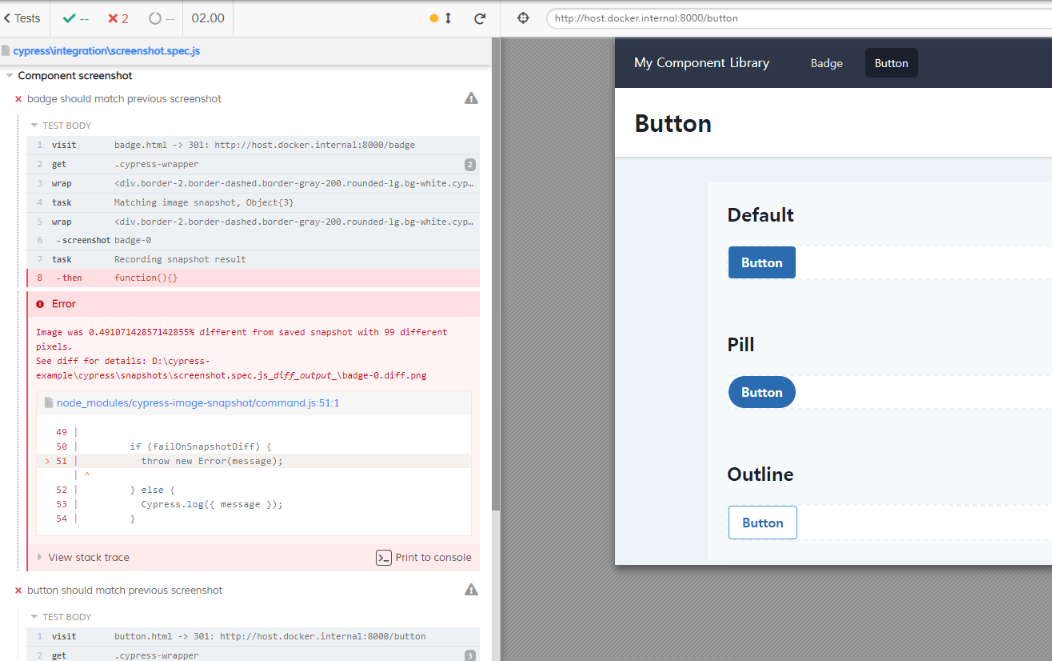
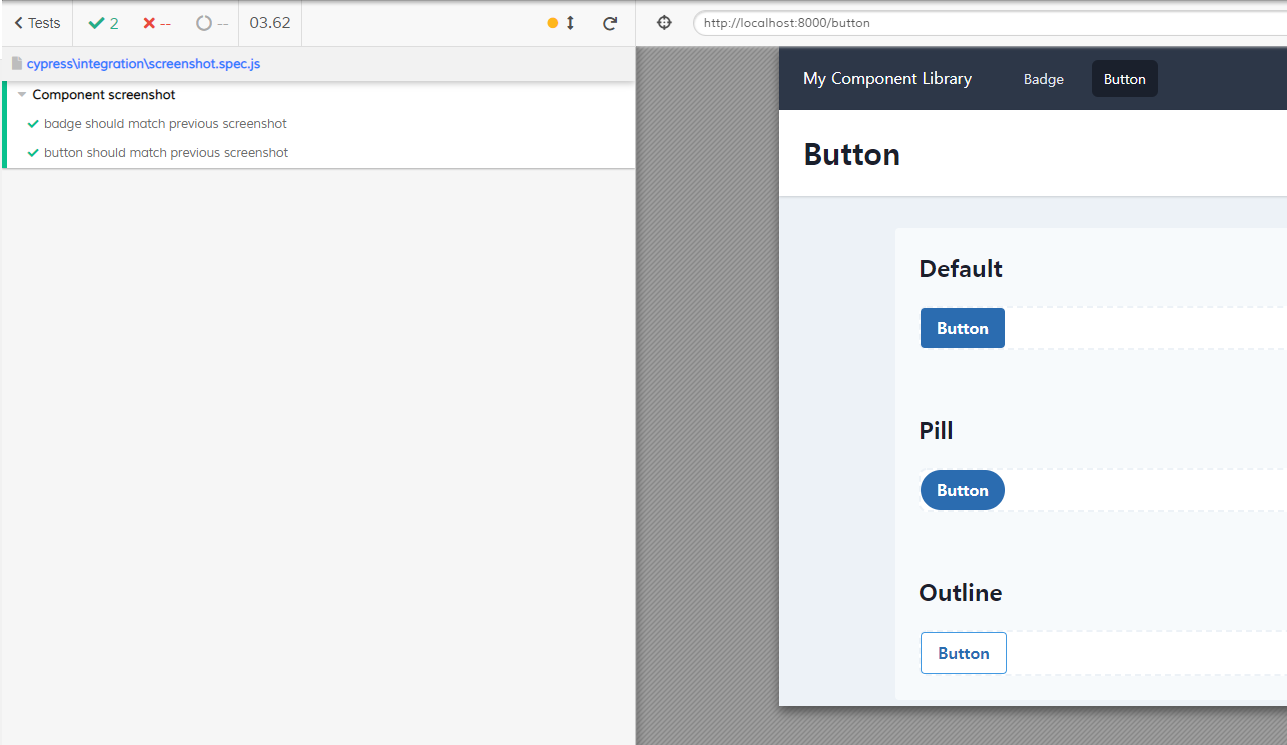
cypress\integration\screenshot.spec.js
"cypress-wrapper" 요소를 찾은 다음 이미지가 이전 스크린샷과 일치하는지 확인
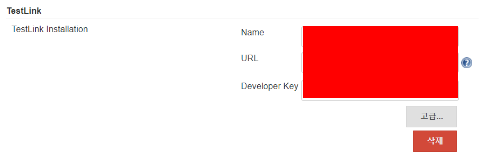
파일 위치는 테스트 링크 버전마다 다를 수 있으므로 해당 서버에 접속해서 위치 확인 후 입력
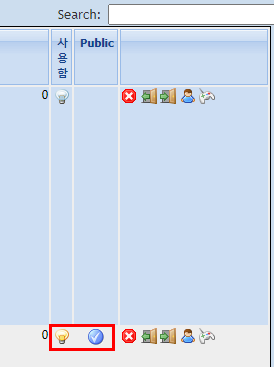
Developer Key : 아래 그림파일 참고하여 개인 API 접근 키 복붙
사용자를 여러 명 입력하고 싶으면 아래 추가 버튼을 눌러 해당 개인 API 접근키로 등록!
테스트링크 > 사용자정보 > API 인터페이스 > 개인 API 접근 키
추후 테스트 링크에 자동 입력될 사용자
2. Jenkins JOB 별 RobotFramework Plugin 관련 설정
"오래된 빌드 삭제 > 보관할 최대 개수 1" : 테스트 결과는 테스트 링크와 연동되어 자동으로 기록되어있기 때문에 1개로 함
"Restrict where this project can be run" : 해당 Job이 수행될 Agent 설정(기존에 등록한 Jenkins Agent 등록)
"사용자 빌드 경로 사용" : 빌드가 최초 실행될 디렉터리 지정
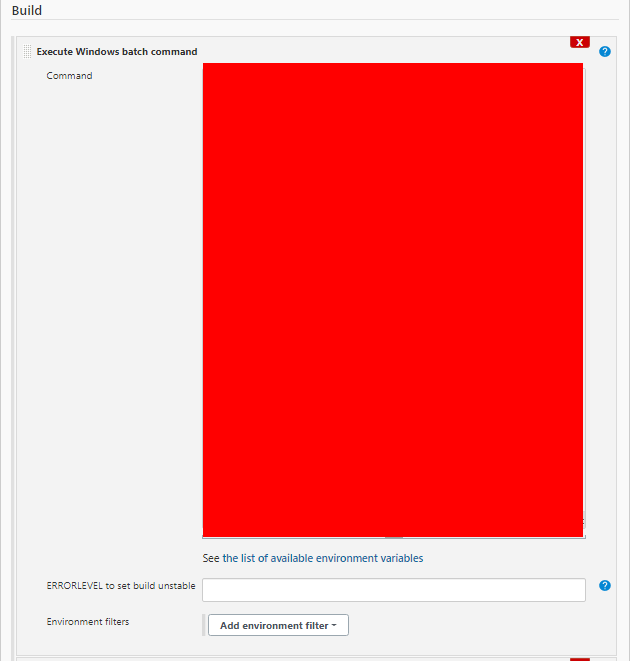
RobotFramework 스크립트 파일을 실행시키는 윈도우 배치 파일 커맨드를 아래와 같이 작성
[간략 설명]
해당 해당 스크립트를 실행하고 해당 테스트가 Pass 가되면 결과 파일(junit.xml)을 남기고
해당 테스트가 Fail 시 한번 더 실행해서 최초 실행 결과 파일과 머지하여 최종 결과 파일(junit.xml)을 남긴다
cd C:\AutoTest\Server\Target
::Executable
:: clean previous output files
@echo off
rd /s /q Results_Target
echo #######################################
echo # Running tests first time 	   #
echo #######################################
robot -x original_junit.xml --output original.xml -d Results_Target 1_1_1_2_Target.robot
:: we stop the script here if all the tests were OK
if errorlevel 1 goto DGTFO
echo #######################################
echo # Tests passed, no rerun 		   #
echo #######################################
:: we keep a copy of the first output file (added)
copy Results_Target\original.xml Results_Target\output.xml /Y
copy Results_Target\original_junit.xml Results_Target\junit.xml /Y
exit /b
:: otherwise we go for another round with the failing tests
:DGTFO
:: we keep a copy of the first log file
copy Results_Target\log.html Results_Target\first_run_log.html /Y

:: we launch the tests that failed
echo #######################################
echo # Running again the tests that failed #
echo #######################################
cd Results_Target
del /q original_junit.xml
robot -R original.xml --output rerun.xml "\AutoTest\Server\Target\1_1_1_2_Target.robot"
:: Robot Framework generates file rerun.xml

:: we keep a copy of the second log file
copy log.html second_run_log.html /Y

:: Merging output files
echo ########################
echo # Merging output files #
echo ########################
rebot --NoStatusRC -x junit.xml --output output.xml -R original.xml rerun.xml
:: Robot Framework generates a new output.xml
3. Jenkins JOB 별 TestLink Plugin 관련 설정
프로젝트 > 구성 > Build > Add build step > Invoke TestLink
TestLink Version : Jenkins와 관련된 TestLink Server 정보 설정에서 설정한 버전 선택
Test Project Name : 연동할 TestLink의 테스트 프로젝트 이름
Test Plan Name : 연동 할 TestLink의 테스트 계획 이름
Build Name : 연동 할 TestLink의 빌드 이름
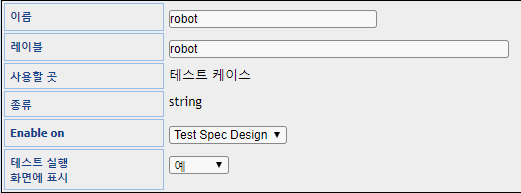
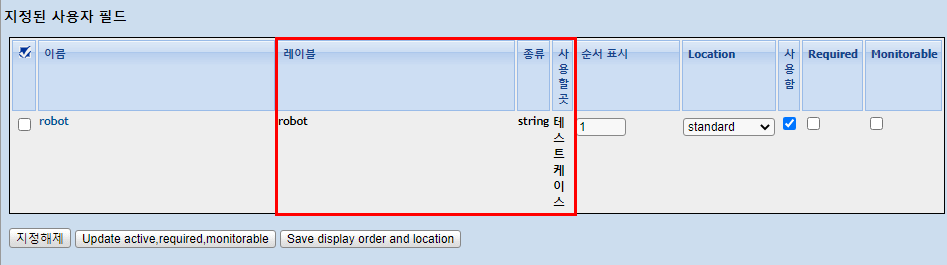
Custom Fields : 연동 할 TestLink의 사용자 필드 이름
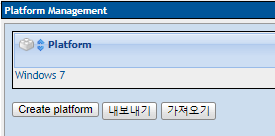
Platform Name : 연동 할 TestLink의 플랫폼 이름(고급 버튼 클릭 시 활성화)
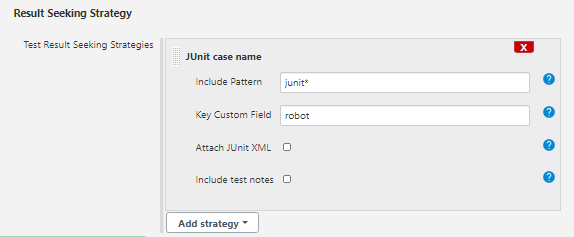
프로젝트 > 구성 > Build > Add build step > Result Seeking Strategy
Include Pattern : junit파일 이름
사용자 빌드 경로가 적용되므로 경로를 입력하지 않는다.
Key Custom Field : TestLink 사용자 정의 필드 이름
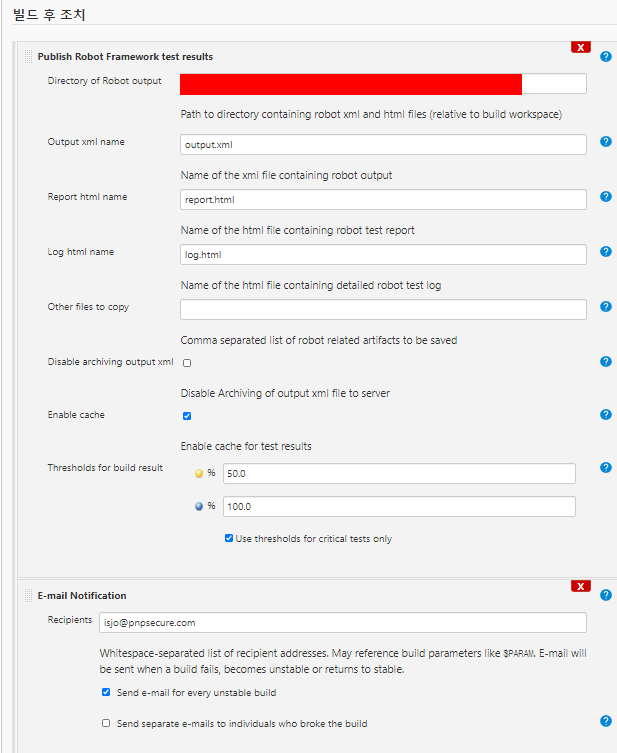
아래는 해당 빌드 후 조치에 대한 설정이다.
"Dritectory of Robot output" : C:\AutoTest\Server\Target\Results_Target