


해당 문서에는 Jenkins와 RobotFrameowrk & TestLink를 연동하는 내용을 설명합니다.
설치에 대한 내용은 생략합니다.
[TestLink 관련 설정]
TestLink 서버 접속하여 아래와 같이 "config.inc.pnp" 파일 설정 변경
$ tlCfg-> api-> enabled = TRUE;
$ tlCfg-> exec_cfg-> enabled_test_automation = ENABLED;
테스트 프로젝트 설정 확인

테스트 계획 설정 사전 확인
"사용함" 및 "Pubilc"인 상태가 되어야 함(당연한 얘기지만)
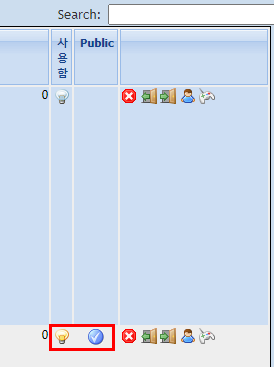
테스트 플랜 이름은 영어로!
테스트 플랜 이름이 한글이면 뿔난 젠킨스씨를 만나게 될 것이야!

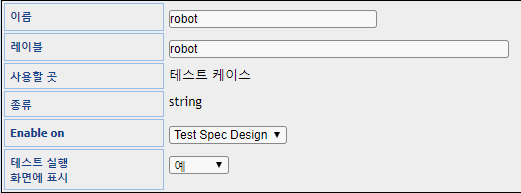
사용자 정의 필드 생성
RobotFramework와 매칭 될 사용자 정의 필드를 생성한다
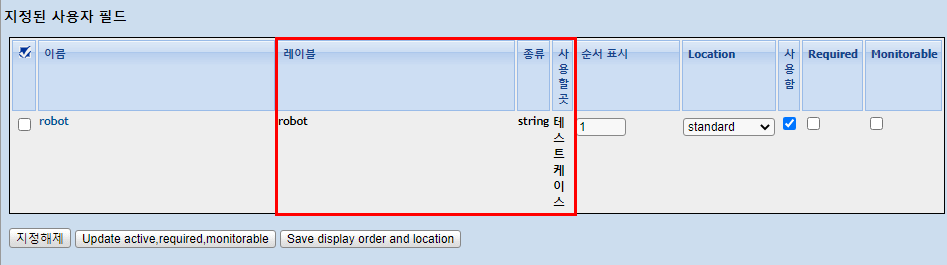
사용자 필드 지정
앞서 생성한 사용자 정의 필드가 RobotFramework의 매칭 될 부분을 지정한다
필자는 RobotFramework의 테스트 케이스와 테스트 링크 테스트 케이스와 1:1 매칭 하기 위해 아래와 같이 설정하였다.
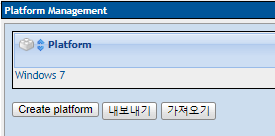
플랫폼 확인 및 지정
테스트 케이스 설정 확인
테스트 케이스의 설정을 아래와 같이 설정해준다
실행 형태 : Automated
아래 사용자 정의 필드 생성한 항목이 있다. 해당 항목은 RobotFramework 스크립트의 해당 테스트 케이스 이름으로 입력!

테스트 케이스 추가 확인
아래와 같이 해당 플랫폼에 해당 테스트케이스가 해당 사용자로 추가가 되어야 한다.
요구 항목 : 테스트 계획, 테스트 플랜, 테스트 플랫폼, 테스트 케이스, 테스터

[Jenkins관련 설정]
1. Jenkins와 관련된 TestLink Server 개인 API 정보 설정
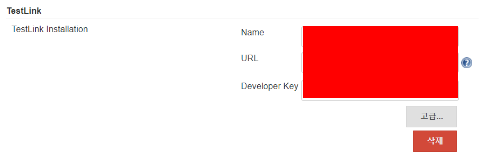
Name : Toast(해당 API 키를 구분할 수 있으면 됨)
URL : http://"TestLinkServerIP"/lib/api/xmlrpc/v1/xmlrpc.php
[테스트 링크 서버 IP]/xmlrpc.php파일위치/xmlrpc.php
파일 위치는 테스트 링크 버전마다 다를 수 있으므로 해당 서버에 접속해서 위치 확인 후 입력
Developer Key : 아래 그림파일 참고하여 개인 API 접근 키 복붙
사용자를 여러 명 입력하고 싶으면 아래 추가 버튼을 눌러 해당 개인 API 접근키로 등록!

추후 테스트 링크에 자동 입력될 사용자
2. Jenkins JOB 별 RobotFramework Plugin 관련 설정

"오래된 빌드 삭제 > 보관할 최대 개수 1" : 테스트 결과는 테스트 링크와 연동되어 자동으로 기록되어있기 때문에 1개로 함
"Restrict where this project can be run" : 해당 Job이 수행될 Agent 설정(기존에 등록한 Jenkins Agent 등록)
"사용자 빌드 경로 사용" : 빌드가 최초 실행될 디렉터리 지정
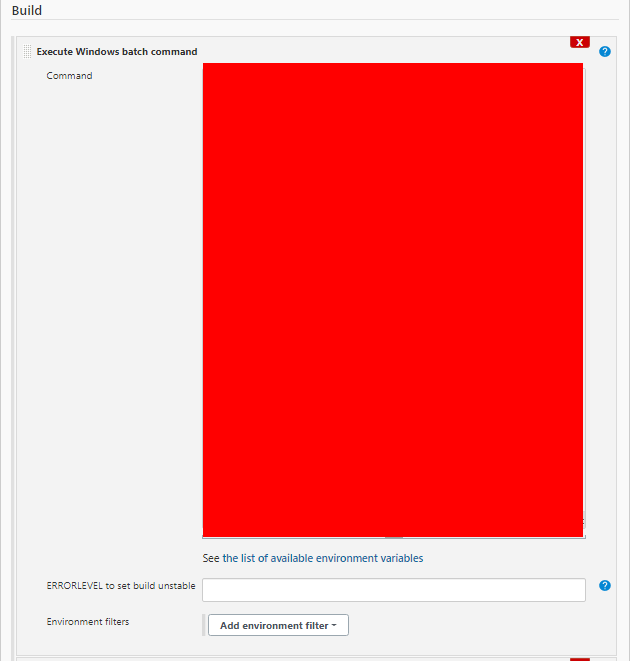
RobotFramework 스크립트 파일을 실행시키는 윈도우 배치 파일 커맨드를 아래와 같이 작성
[간략 설명]
해당 해당 스크립트를 실행하고 해당 테스트가 Pass 가되면 결과 파일(junit.xml)을 남기고
해당 테스트가 Fail 시 한번 더 실행해서 최초 실행 결과 파일과 머지하여 최종 결과 파일(junit.xml)을 남긴다
cd C:\AutoTest\Server\Target
::Executable
:: clean previous output files
@echo off
rd /s /q Results_Target
echo #######################################
echo # Running tests first time 	   #
echo #######################################
robot -x original_junit.xml --output original.xml -d Results_Target 1_1_1_2_Target.robot
:: we stop the script here if all the tests were OK
if errorlevel 1 goto DGTFO
echo #######################################
echo # Tests passed, no rerun 		   #
echo #######################################
:: we keep a copy of the first output file (added)
copy Results_Target\original.xml Results_Target\output.xml /Y
copy Results_Target\original_junit.xml Results_Target\junit.xml /Y
exit /b
:: otherwise we go for another round with the failing tests
:DGTFO
:: we keep a copy of the first log file
copy Results_Target\log.html Results_Target\first_run_log.html /Y

:: we launch the tests that failed
echo #######################################
echo # Running again the tests that failed #
echo #######################################
cd Results_Target
del /q original_junit.xml
robot -R original.xml --output rerun.xml "\AutoTest\Server\Target\1_1_1_2_Target.robot"
:: Robot Framework generates file rerun.xml

:: we keep a copy of the second log file
copy log.html second_run_log.html /Y

:: Merging output files
echo ########################
echo # Merging output files #
echo ########################
rebot --NoStatusRC -x junit.xml --output output.xml -R original.xml rerun.xml
:: Robot Framework generates a new output.xml
3. Jenkins JOB 별 TestLink Plugin 관련 설정

TestLink Version : Jenkins와 관련된 TestLink Server 정보 설정에서 설정한 버전 선택
Test Project Name : 연동할 TestLink의 테스트 프로젝트 이름
Test Plan Name : 연동 할 TestLink의 테스트 계획 이름
Build Name : 연동 할 TestLink의 빌드 이름
Custom Fields : 연동 할 TestLink의 사용자 필드 이름
Platform Name : 연동 할 TestLink의 플랫폼 이름(고급 버튼 클릭 시 활성화)
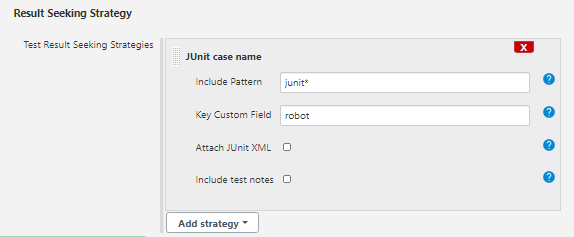
Include Pattern : junit파일 이름
사용자 빌드 경로가 적용되므로 경로를 입력하지 않는다.
Key Custom Field : TestLink 사용자 정의 필드 이름
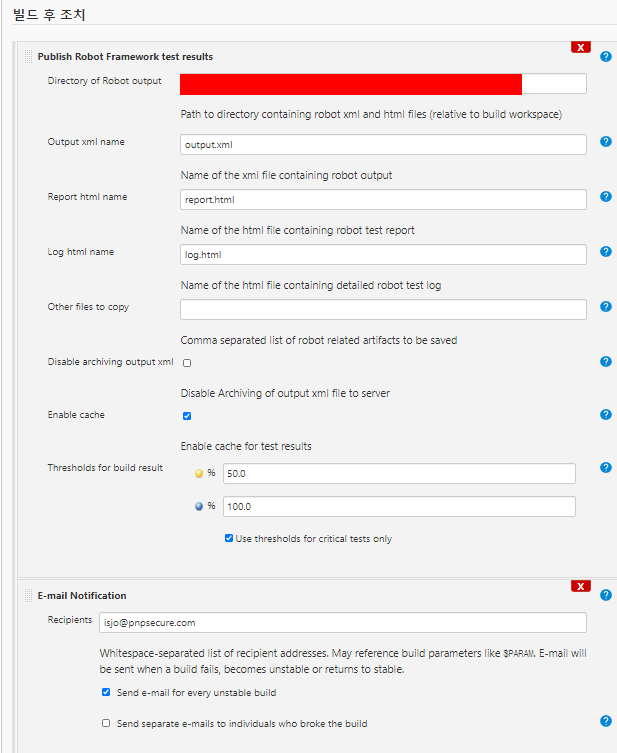
아래는 해당 빌드 후 조치에 대한 설정이다.
"Dritectory of Robot output" : C:\AutoTest\Server\Target\Results_Target
위의 배치 스크립트에서 지정한 테스트 결과 폴더
만약 파이프라인으로 JOB을 등록 시
빌드 실패 시 라인으로 빌드결과 알림(샘플)
node {
    try{
        stage("Test_PASS"){
            build job: 'Testlink_test'
        }
        stage("Test_Fail"){
            build job: 'Testlink_fail'
        }

    currentBuild.result = 'SUCCESS'
    }catch (err) {
        currentBuild.result = 'FAILURE'
    }

    stage 'Notify'
        notifyLINE('bigFEmC2IIlEOssfsfyjgX4Wuh7TDbmos6zU6CYOM7L', currentBuild.result)
}

def notifyLINE(token, result) {
    def isFailure = result == 'FAILURE'

    def url = 'https://notify-api.line.me/api/notify'
    def message = "Result is ${result}. \n${env.BUILD_URL}"

    sh "curl ${url} -H 'Authorization: Bearer ${token}' -F 'message=${message}' "
}
자세한 내용은 아래 URL 참고
https://plugins.jenkins.io/testlink/
TestLink
This plugin integrates Jenkins and TestLink.
plugins.jenkins.io
https://wiki.jenkins.io/display/JENKINS/Robot+Framework+Plugin
Robot Framework
This publisher stores Robot Framework test reports for builds and shows summaries of them in project and build views along with trend graph.
plugins.jenkins.io
'UI Test > Jenkins' 카테고리의 다른 글
| Gitlab Webhook으로 Jenkins 빌드 자동화 (0) | 2022.03.10 |
|---|

정신차려이각박한세상속에서